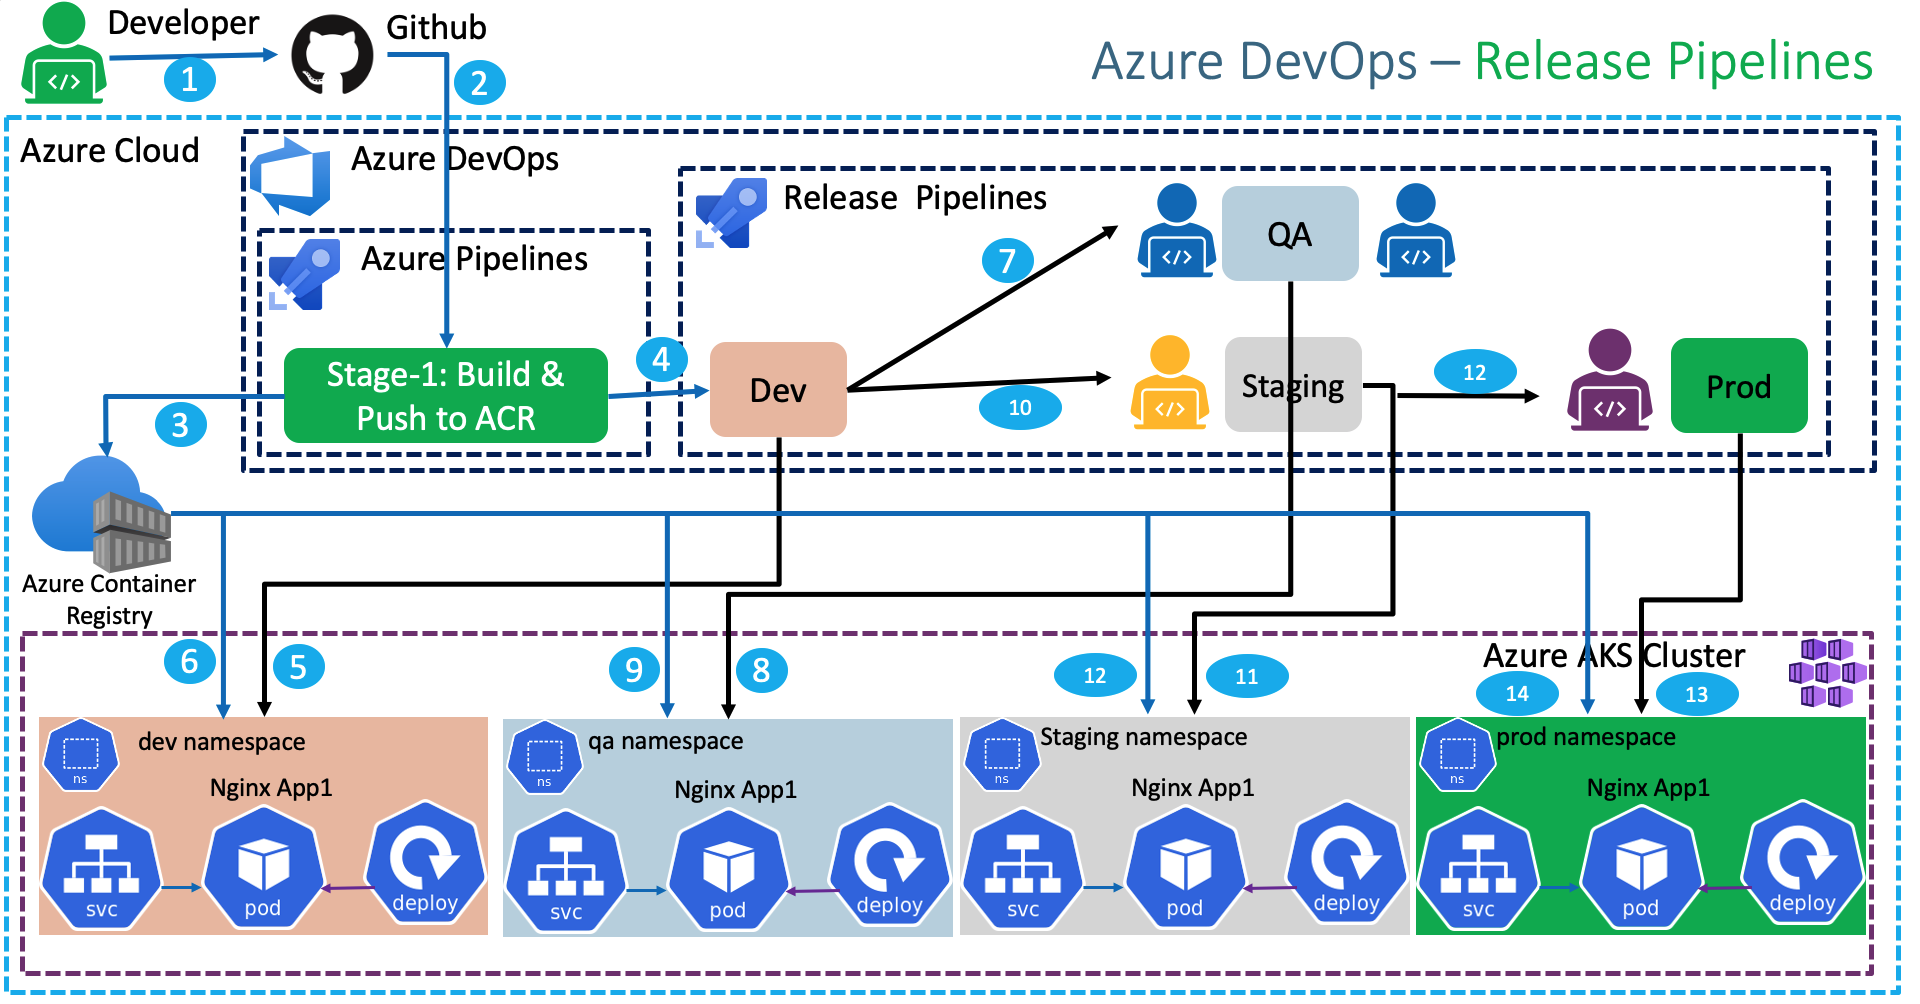
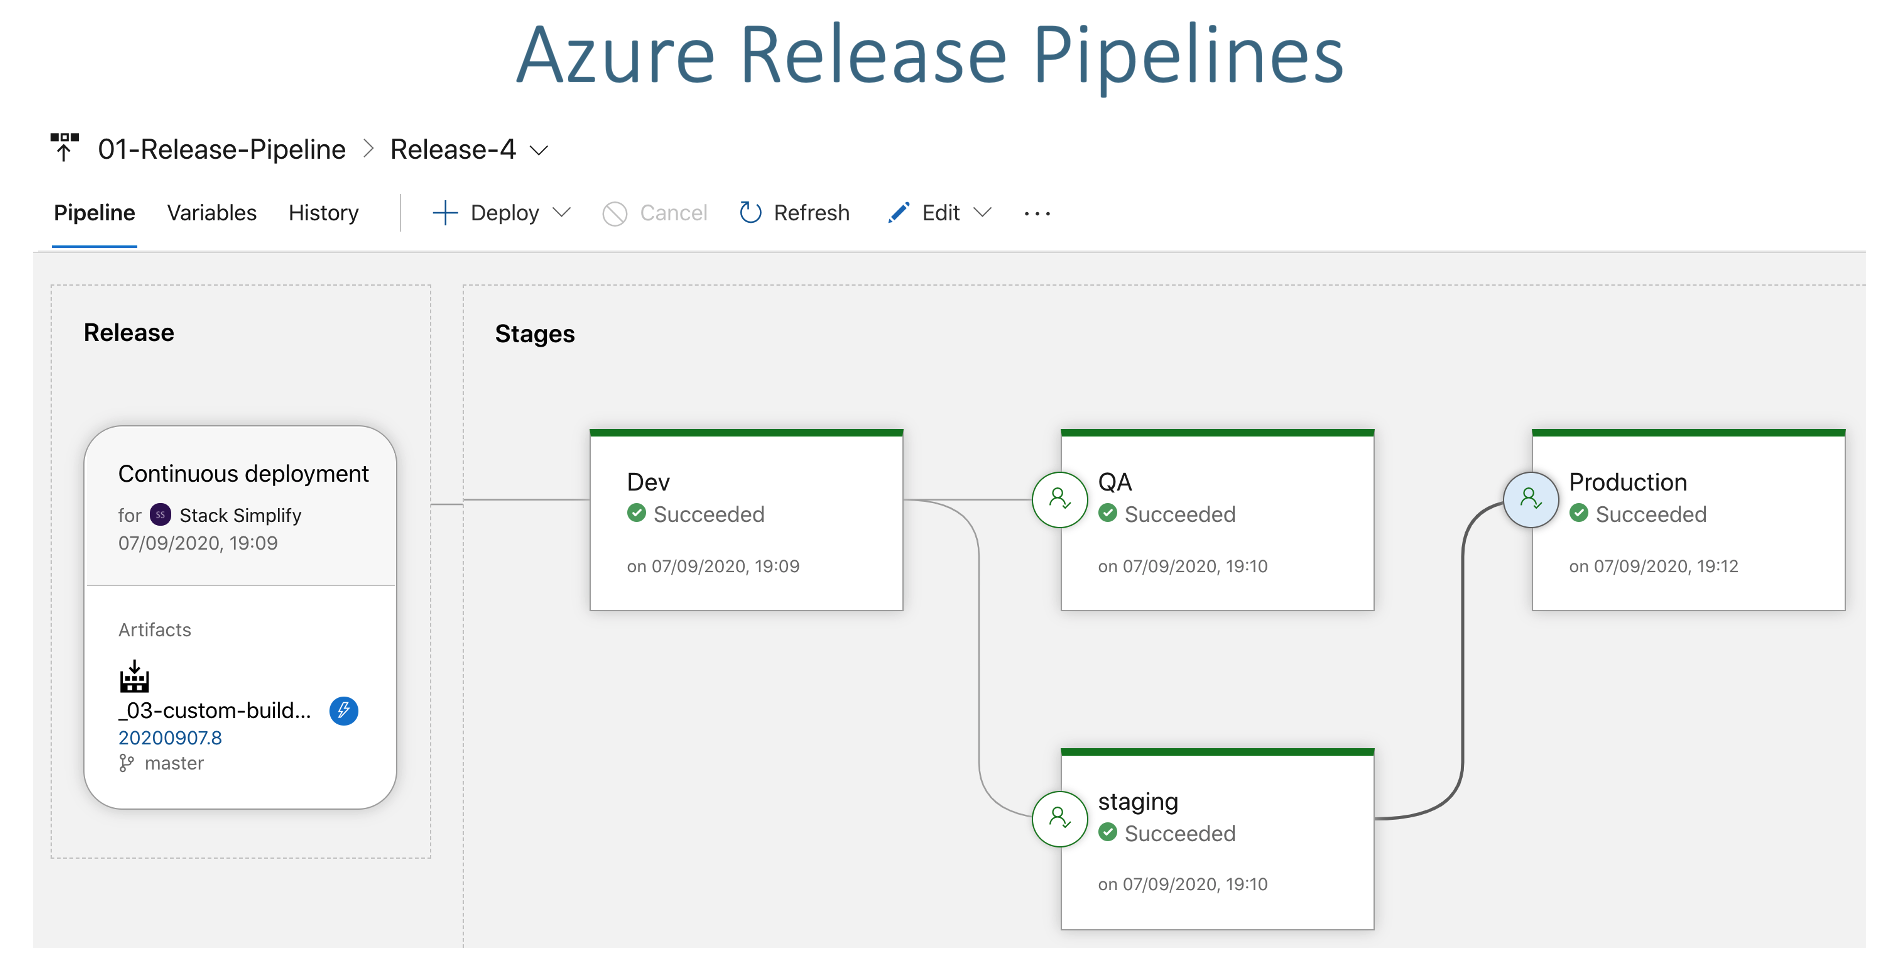
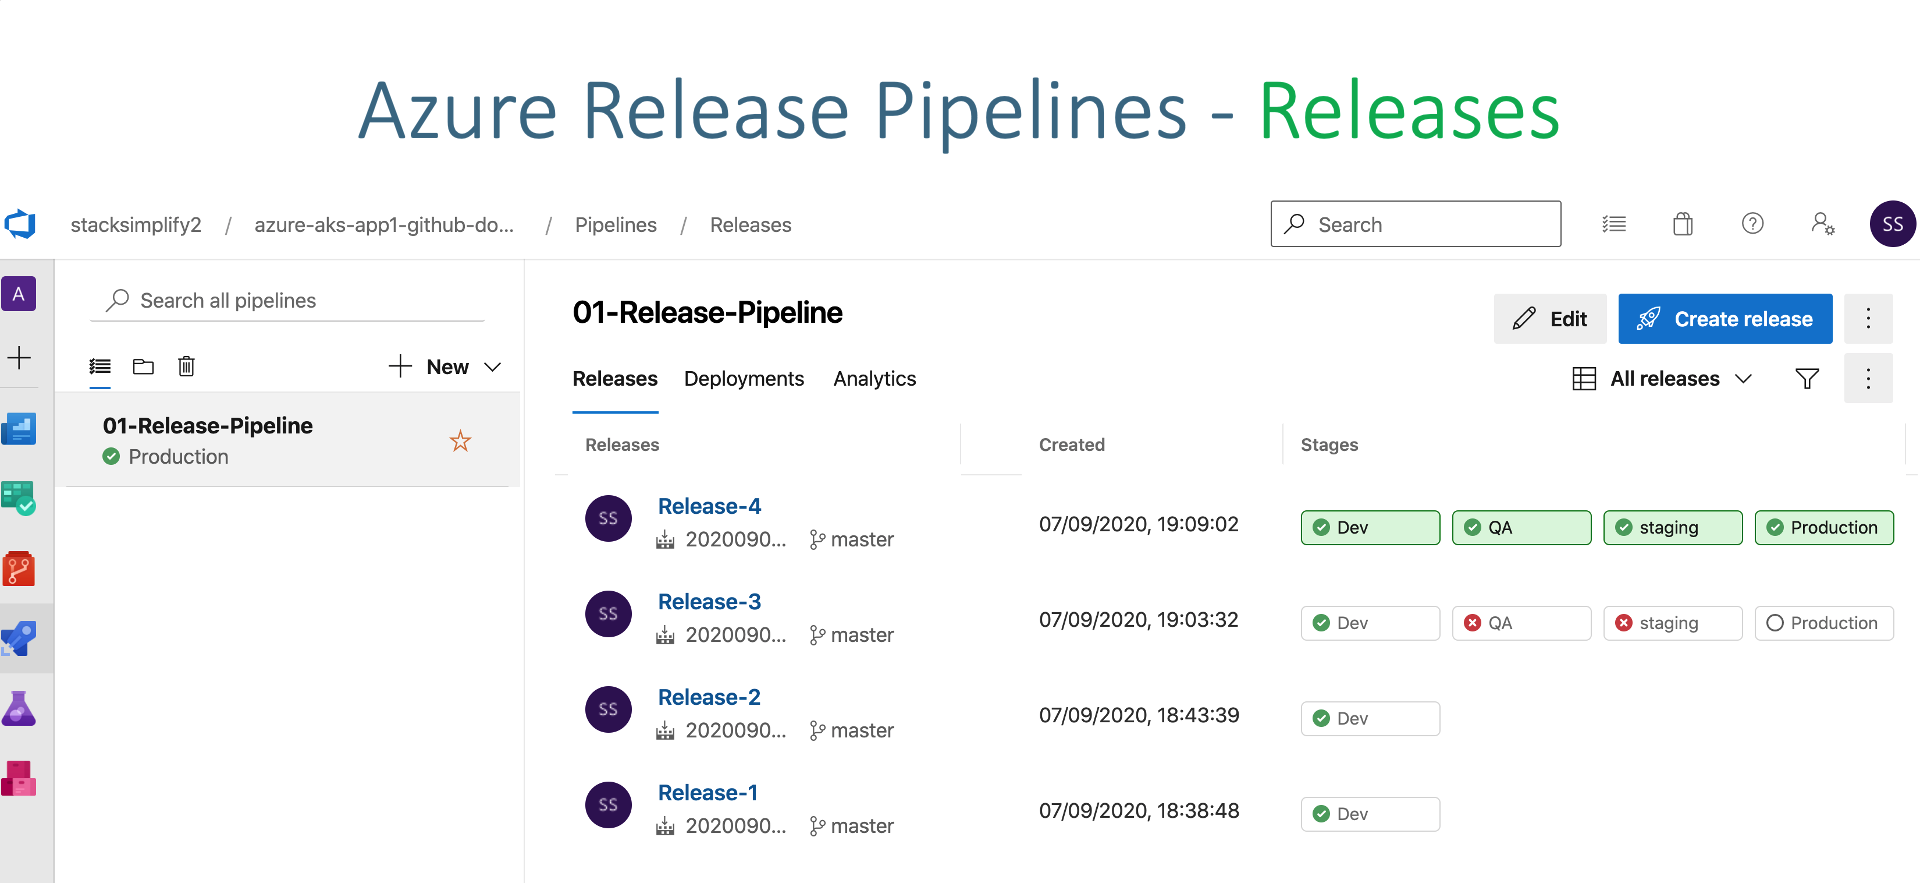
Azure DevOps Release Pipelines Step-01: Introduction Understand Release Pipelines concept Create Release Pipelines to Deploy to Kubernetes Dev, QA, Staging and Prod namespaces Add Pre-Deployment email approval for QA, Staging and Prod environment deployments
VIDEO Step-02: Create Namespaces # List Namespaces
kubectl get ns
# Create Namespaces
kubectl create ns dev
kubectl create ns qa
kubectl create ns staging
kubectl create ns prod
# List Namespaces
kubectl get ns
Step-03: Create Service Connections for Dev, QA, Staging and Prod Namespaces in Kubernetes Cluster Dev Service Connection Go to Project -> azure-devops-github-acr-aks-app1 -> Project Settings -> Pipelines -> Service Connections Click on New Service Connection Choose a service or connection type: kubernetes Authentication Method: Azure Subscription Username: Azure Cloud Administrator Password: Azure Cloud Admin Password Cluster: aksdemo2 Namespace: dev Service connection name: dev-ns-k8s-aks-svc-conn Description: Dev Namespace AKS Cluster Service Connection Security: Grant access permission to all pipelines (default Checked) Click on SAVE QA Service Connection Go to Project -> azure-devops-github-acr-aks-app1 -> Project Settings -> Pipelines -> Service Connections Click on New Service Connection Choose a service or connection type: kubernetes Authentication Method: Azure Subscription Username: Azure Cloud Administrator Password: Azure Cloud Admin Password Cluster: aksdemo2 Namespace: qa Service connection name: qa-ns-k8s-aks-svc-conn Description: QA Namespace AKS Cluster Service Connection Security: Grant access permission to all pipelines (default Checked) Click on SAVE Staging Service Connection Go to Project -> azure-devops-github-acr-aks-app1 -> Project Settings -> Pipelines -> Service Connections Click on New Service Connection Choose a service or connection type: kubernetes Authentication Method: Azure Subscription Username: Azure Cloud Administrator Password: Azure Cloud Admin Password Cluster: aksdemo2 Namespace: staging Service connection name: staging-ns-k8s-aks-svc-conn Description: Staging Namespace AKS Cluster Service Connection Security: Grant access permission to all pipelines (default Checked) Click on SAVE Production Service Connection Go to Project -> azure-devops-github-acr-aks-app1 -> Project Settings -> Pipelines -> Service Connections Click on New Service Connection Choose a service or connection type: kubernetes Authentication Method: Azure Subscription Username: Azure Cloud Administrator Password: Azure Cloud Admin Password Cluster: aksdemo2 Namespace: prod Service connection name: prod-ns-k8s-aks-svc-conn Description: Production Namespace AKS Cluster Service Connection Security: Grant access permission to all pipelines (default Checked) Click on SAVE Step-04: Create Release Pipeline - Add Artifacts Release Pipeline Name: 01-app1-release-pipeline Add Artifact Source Type: Build Project: leave to default (azure-aks-app1-github-acr) Source (Build Pipeline): App1-Pipelines\04-custom2-BuildPushToACR-Publish-k8s-manifests-to-AzurePipelines Default Version: Latest (auto-populated) Source Alias: leave to default (auto-populated) Click on Add Continuous Deployment Trigger Continuous deployment trigger: Enabled Step-05: Release Pipeline - Create Dev Stage Go to Pipelines -> Releases Create new Release Pipeline Create Dev Stage and Test Stage Name: Dev Create Task Agent Job: Change to Ubunut Linux (latest) Add Task: Create Secret Display Name: Create Secret to allow image pull from ACR Action: create secret Kubernetes service connection: dev-ns-k8s-aks-svc-conn Namespace: dev Type of secret: dockerRegistry Secret name: dev-aksdevopsacr-secret Docker registry service connection: manual-aksdevopsacr-svc Rest all leave to defaults Click on SAVE to save release Comment: Dev k8s Create Secret task added Add Task: Deploy to Kubernetes Display Name: Deploy to AKS Action: deploy Kubernetes Service Connection: dev-ns-k8s-aks-svc-conn Namespace: dev Strategy: None Manifest: Select 01-Deployment-and-LoadBalancer-Service.yml from build artifacts # Sample Value for Manifest after adding it
Manifest: $(System.DefaultWorkingDirectory)/_04-custom2-BuildPushToACR-Publish-k8s-manifests-to-AzurePipelines/kube-manifests/01-Deployment-and-LoadBalancer-Service.yml
Container: aksdevopsacr.azurecr.io/custom2aksnginxapp1:$(Build.BuildId) ImagePullSecrets: dev-aksdevopsacr-secret Rest all leave to defaults Click on SAVE to save release Comment: Dev k8s Deploy task added Step-06: Verify k8s Deployment Manifest Image Review the image value and update it from Container registry if required File: kube-manifests/01-Deployment-and-LoadBalancer-Service.yml spec :
containers :
- name : app1-nginx
image : aksdevopsacr.azurecr.io/custom2aksnginxapp1
ports :
- containerPort : 80
Step-07: Check-In Code and Test Update index.html # Commit and Push
git commit -am "V11 Commit"
git push
View Build Logs View Dev Release logs Access App after successful deployment # Get Public IP
kubectl get svc -n dev
# Access Application
http://<Public-IP-from-Get-Service-Output>
Step-08: Update Deploy to AKS Task with Build.SourceVersion in Release Pipelines Go to Release Pipelines -> 01-app1-release-pipeline -> Edit -> Dev Tasks Go to Deploy to AKS Task Replace #Before
Containers: aksdevopsacr.azurecr.io/custom2aksnginxapp1:$(Build.BuildId)
# After
Containers: aksdevopsacr.azurecr.io/custom2aksnginxapp1:$(Build.SourceVersion)
Click on SAVE to save release Comment: Dev Container Tag changed from Build Id to Build Source Version Step-09: Check-In Code and Test Update index.html # Commit and Push
git commit -am "V12 Commit"
git push
View Build Logs View Dev Release logs Access App after successful deployment # Get Public IP
kubectl get svc -n dev
# Access Application
http://<Public-IP-from-Get-Service-Output>
Verify Github Commit Id on Github Repository and Container Registry Step-10: Create QA, Staging and Prod Release Stages Create QA, Staging and Prod Stages Add Email Approvals Click on SAVE to save release Clone Dev Stage to Create QA Stage Go to Releases -> 01-app1-release-pipeline -> Edit Select Dev Stage -> Add -> Clone Stage Stage Name: QA Task-1: Create Secret Kubernetes service connection: qa-ns-k8s-aks-svc-conn Namespace: qa Secret name: qa-aksdevopsacr-secret Click SAVE Commit Message: QA Create Secret task updated Task-2: Deploy to AKS Kubernetes service connection: qa-ns-k8s-aks-svc-conn Namespace: qa ImagePullSecrets: qa-aksdevopsacr-secret Click SAVE Commit Message: QA Deploy to AKS task updated Step-11: Check-In Code and Test Update index.html # Commit and Push
git commit -am "V13 Commit"
git push
View Build Logs View Dev Release logs Access App after successful deployment Approve deployment at qa, staging and prod stages # Get Public IP
kubectl get svc -n dev
kubectl get svc -n qa
kubectl get svc -n staging
kubectl get svc -n prod
kubect get svc --all-namespaces
# Access Application
http://<Public-IP-from-Get-Service-Output>
Step-12: Clean-Up Apps # Before Clean-Up: List all Pods and Services
kubectl get pod,svc --all-namespaces
# Clean-Up all Apps in Kubernetes
kubectl delete ns dev
kubectl delete ns qa
kubectl delete ns staging
kubectl delete ns prod
# After Clean-Up: List all Pods and Services
kubectl get pod,svc --all-namespaces
References


